
How to Stake Stars on a Validator?
If you buy the Star token from Stargaze and want to stake them on a validator, we have just the solution for you. In this tutorial, we are going to talk about how you can stake your Stars by using the Keplr tool and the web wallet. We are going to use Keplr’s browser extension along with the web wallet to stake Stars on a validator.
In the first step, we are going to set up the web wallet and then we are going to talk about how you can actually stake your Stars on the platform. And after that, we are going to talk about some staking operations.
So without further ado, let’s dive straight into the tutorial.
Step 1: Creating the Keplr Wallet
First things first, you will need to create the Keplr Wallet account along with installing the extension on your chrome or edge browser. Keplr makes it easier for you to buy Stars and also stake them on their user-friendly platform.
If you are using Google Chrome or Microsoft Edge, you can easily install the Keplr Wallet’s extension which will make things easier for you. Here’s how you install Keplr.
1. Open the Keplr.app website on your desktop and select “Install Keplr”. You will find that option on the right side of the screen.

2. Click on your browser and in our case, we will select “Chrome” to install Keplr’s Google Chrome extension.

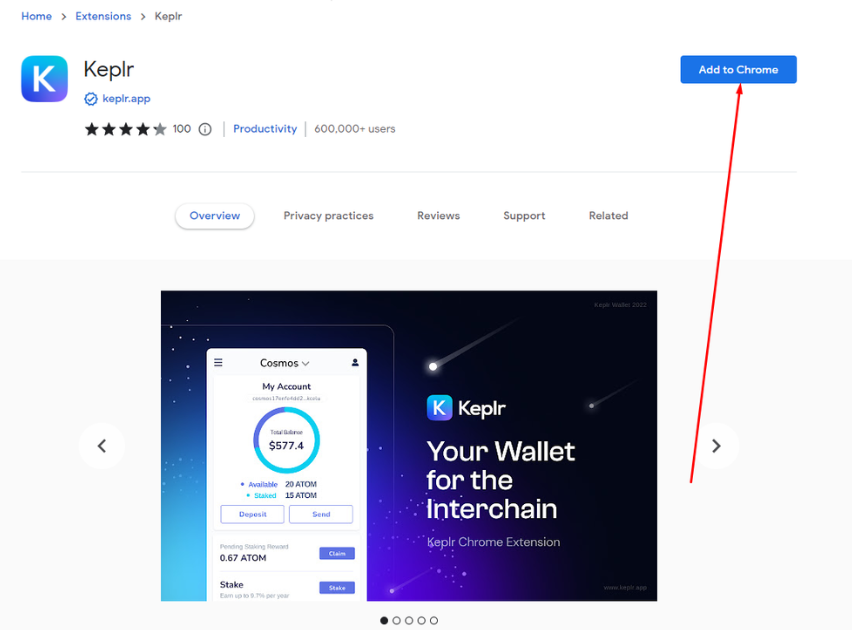
3. Now you will be taken to Google Chrome’s Web Store. From here, all you need to do is to click “Add to Chrome”. Wait for the installation to be completed.
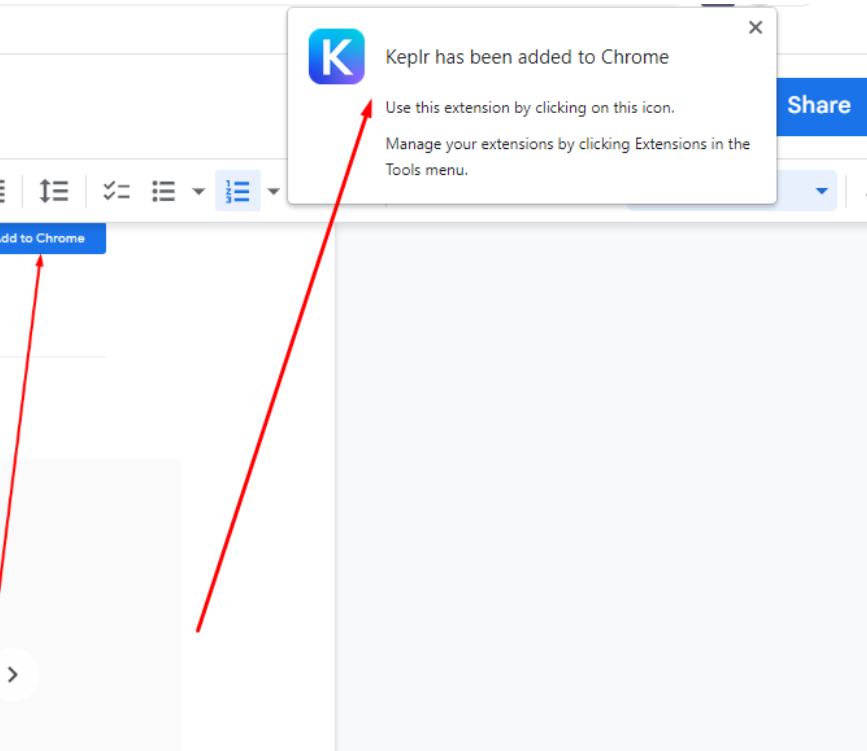
4. Once the extension is installed, you will get a notification saying that Keplr has been installed in your browser.
5. The next step is setting up your account on Keplr. Click on the extension icon on your browser and click on Keplr.

6. You will be taken to Keplr’s login page where you will need to create an account. Click on your suitable signing-up option. By creating a new account, you will also need to enter all your details. Moreover, you can also just log in using the Google Account and sign up even without using an email at all.

7. The wallet will suggest you save the private key while adding some important details. Once you are done, click next.

8. Once you select next, you will be given the notification that you are all set. So click on “Done” and your account will be created.

You can simply visit the Keplr dashboard to further access the features.
Step 2: Depositing OSMO in Keplr Wallet
Now, we will need to deposit coins in your Keplr Wallet. What you can do is send a token like OSMO in your Keplr wallet and we can then swap it for Stars using the Osmosis exchange. All you need to do is to use an exchange like Binance in our example and then we can exchange the OSMO coin for Stars that we are going to stake in the end.
1. Click Keplr in the extension section of your browser. There, you will need to click on the Cosmos Hub’s address where you can deposit your funds.

2. After you copy the address, you need to go to your crypto wallet where you can buy OSMO and deposit it in Keplr. Firstly, fund your Binance account with another coin like USDC before you can trade.

3. On the crypto exchange, you will need to buy OSMO coins as desired so you can exchange them for Stars. By going to the Markets page, you can search for OSMO and select “Trade”.

4. Once you are on the trade page, you will need to select the amount of OSMO you want to buy and then trade it for BUSD.
5. From there, go to your Binance wallet and select Fiat and Spot.

6. Click on transfer, and select the amount that you want to send to your Keplr wallet.

7. Now go to the chrome extension of Keplr and select “Osmosis”.

8. Click on the Wallet’s address to copy and go back to Binance.

9. Select Osmosis and the amount that you want to send. Once you confirm everything, your coins will be available in the Osmosis section in your Keplr wallet.

Step 3: Swapping OSMO with STARS
In this step, we will need to swap OSMO with Stars using the OSMOSIS exchange. This process is rather simple.
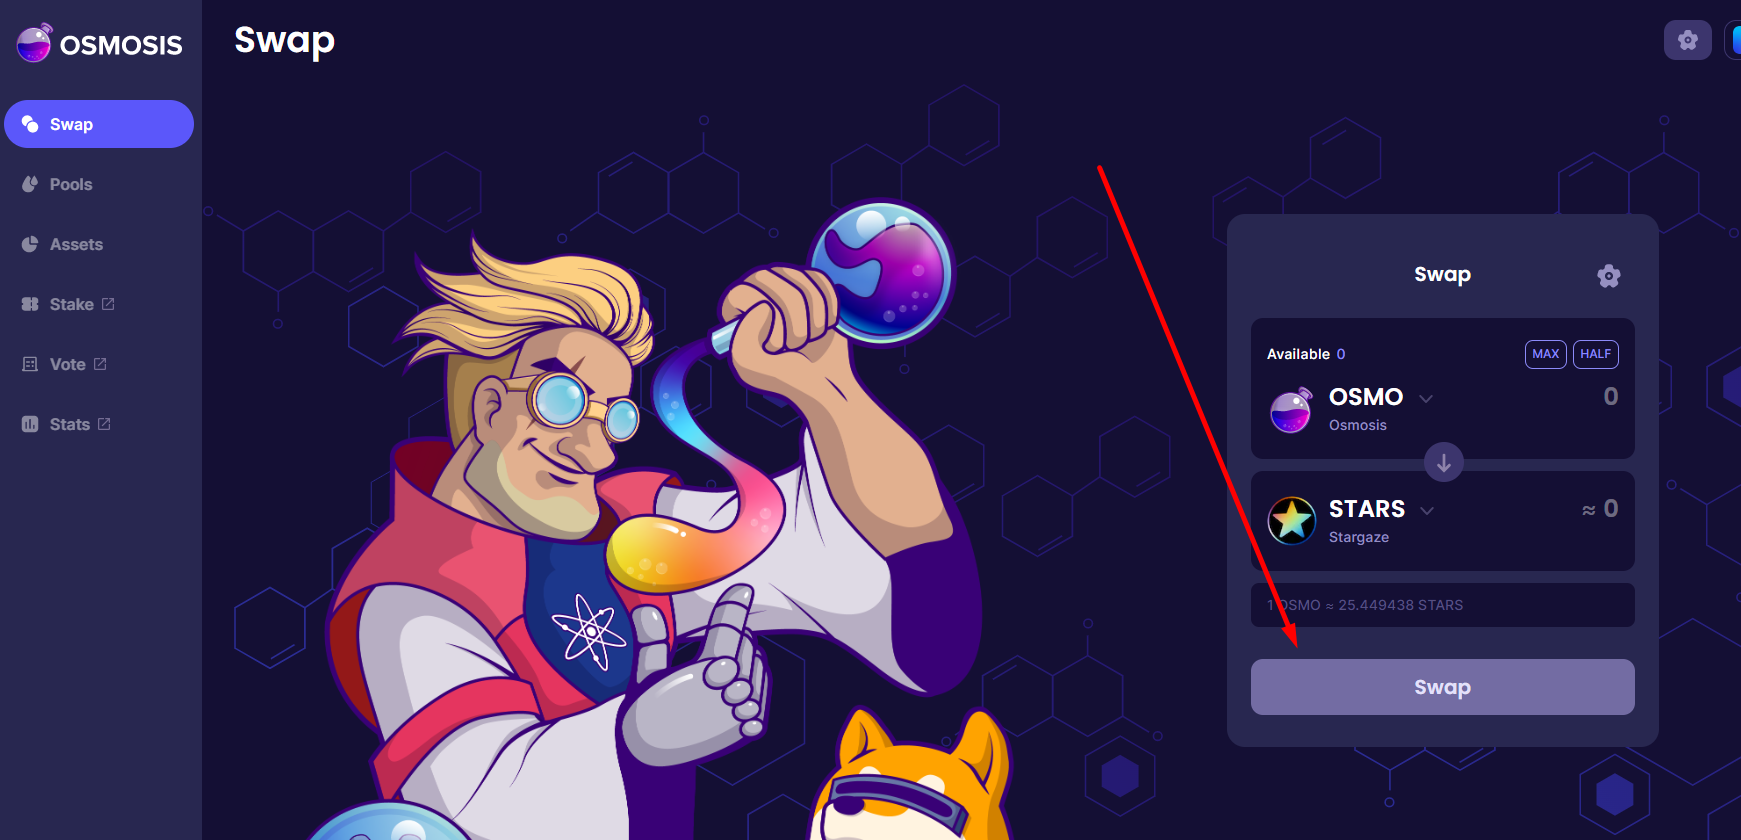
1. Go to Osmosis, select the OSMO coin in one available, and STARS in the exchange one. You will need to connect your Keplr wallet to make it happen. Enter OSMO that you want to trade for STARS and click Swap.
2. Once you have swapped the tokens, go to the assets tab.

3. Locate your STARS and click on “Withdraw”. Withdraw the amount to your Keplr wallet so you can stake your coins there.

Step 4: Staking STARS on Keplr Wallet
In this step, we are going ly stake STARS on the validator on the Keplr wallet. So follow our guide!
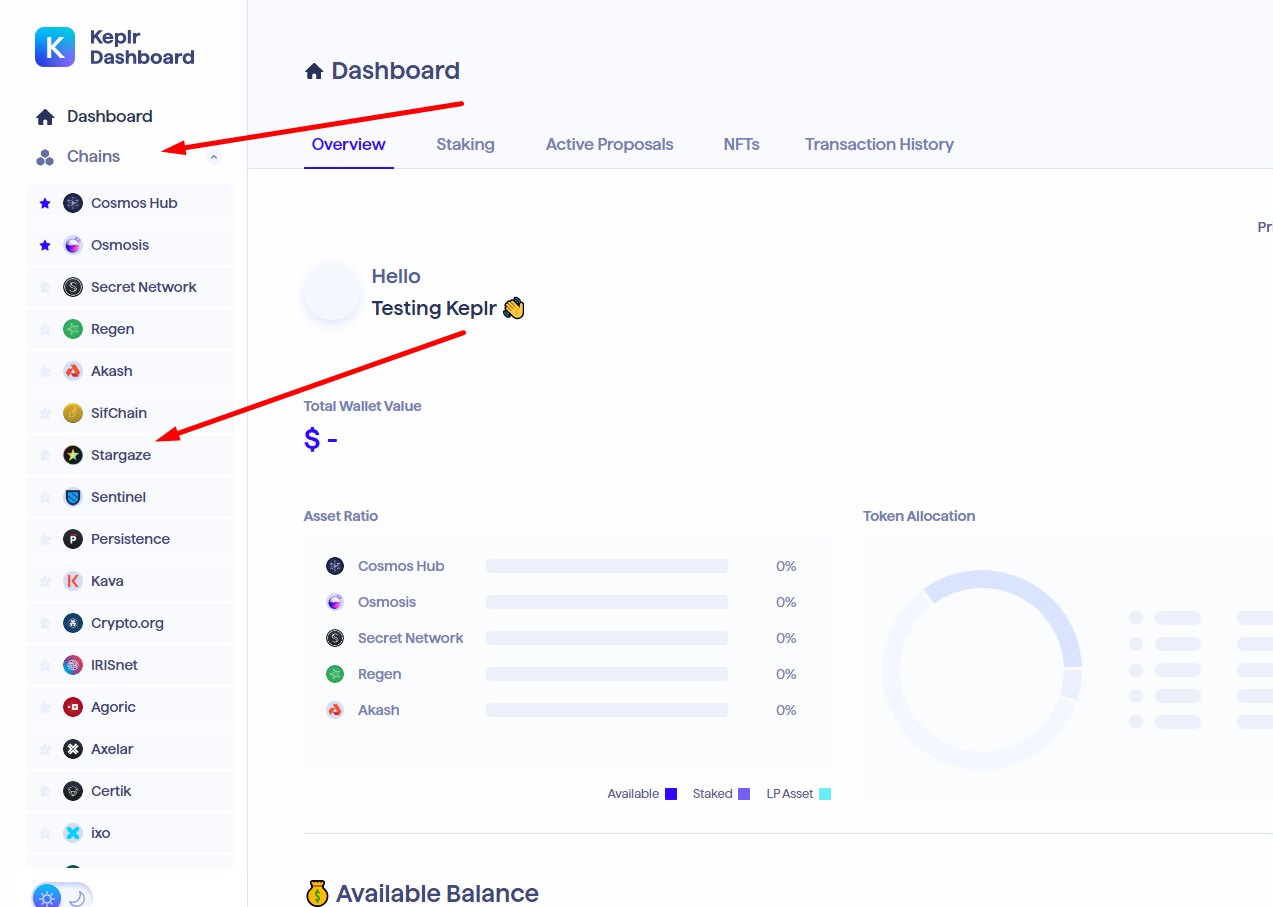
1. Now, you will need to access the Keplr’s dashboard and click the arrow button under Chains and select “Stargaze”.
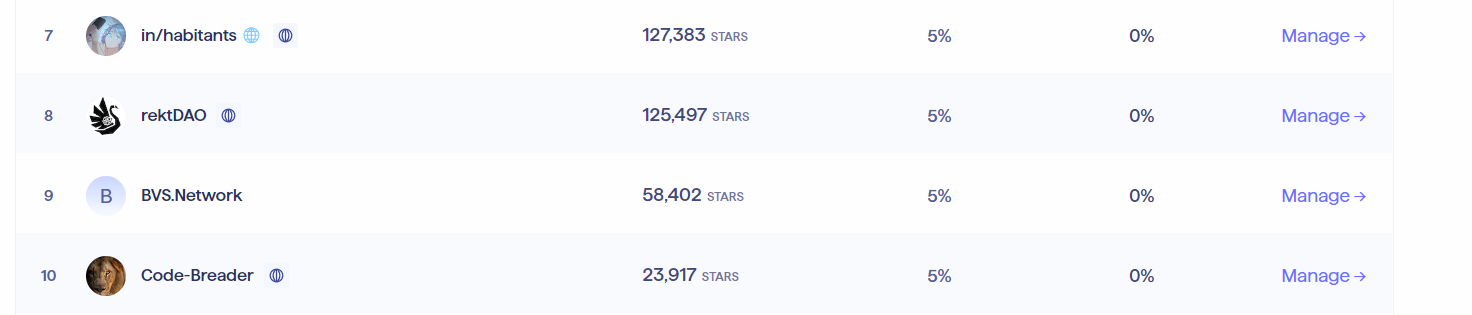
2. Select a validator of your choice and click “Manage” or go directly to inhabitants.zone/validator
3. Enter the number of STARS you want to delegate and press “Delegate”.

4. Now you will need to select the gas fees, you can just leave it on average and select “Set Fee”.

5. At last, you just need to click “Approve” and that’s about it. You have successfully staked STARS on a validator using the Keplr wallet.
6. It doesn’t matter which coin you have staked you can check it by accessing the chrome web extension to see how much reward you have collected.

With Keplr you can stake Atom, Stars, Juno and a lot of projects easily.
Final Verdict
Staking STARS on a validator just got easier thanks to Keplr. It is an awesome wallet that you can use to stake nearly any coin without much effort. By following the 4 main steps with different substeps, you can stake your STARS on Keplr wallet and have all the benefits that come with it.
Delegate to in/habitants at - inhabitants.zone/validator


Disclaimer: The views and opinions expressed in this content are those of the speakers and do not necessarily reflect the views or positions of any entities they represent.This is Not Financial Advice.